
Creating patterns the Madam Löfvall way
- Ashley Webb

- Nov 4, 2020
- 4 min read
As I dive farther and farther into the rabbit hole of this niche in historic costuming, I'm discovering all sorts of interesting ways to examine, identify, and create examples of clothing based from extant garments. In my venture to provide an academic look and discussion into pieces in my own collection, I also thought it would be informative to offer patterns for those looking to replicate pieces of historic clothing.
Now, let me give you a little bit of a disclaimer - I sew like a 5 year old. So, the task of drafting a pattern, modifying it, and creating a toile (a fancy word for mock-up) of the drafted pattern is downright terrifying. And I knew I was going to fail, not once, but probably several times. But the funny thing about determination is that if you have enough of it, you will succeed eventually.
Over the weekend, I decided to create a pattern from an extant garment in my collection. I wanted to learn more about the construction of the piece, as well as try a contemporary method of pattern construction - a method conceived by Madam Löfvall, a "London teacher of high class millinery, dressmaking, and French model cutting." This method, taken from her work How to Cut, Fit, and Finish a Dress published in 1892, creates a pattern from a bodice that one already owns, which makes it a decent method for extant garments.


I totally thought the garment that I was working off of was going to be easy - which is why I chose it as the first piece to attempt this method. Holy cow, was I wrong! I'm not going to go into too much detail about the garment itself, as I plan to do a video (fingers crossed) and a longer post about it later this month. It's a beautiful 1886-1887 velvet capelet with purple silk lining.
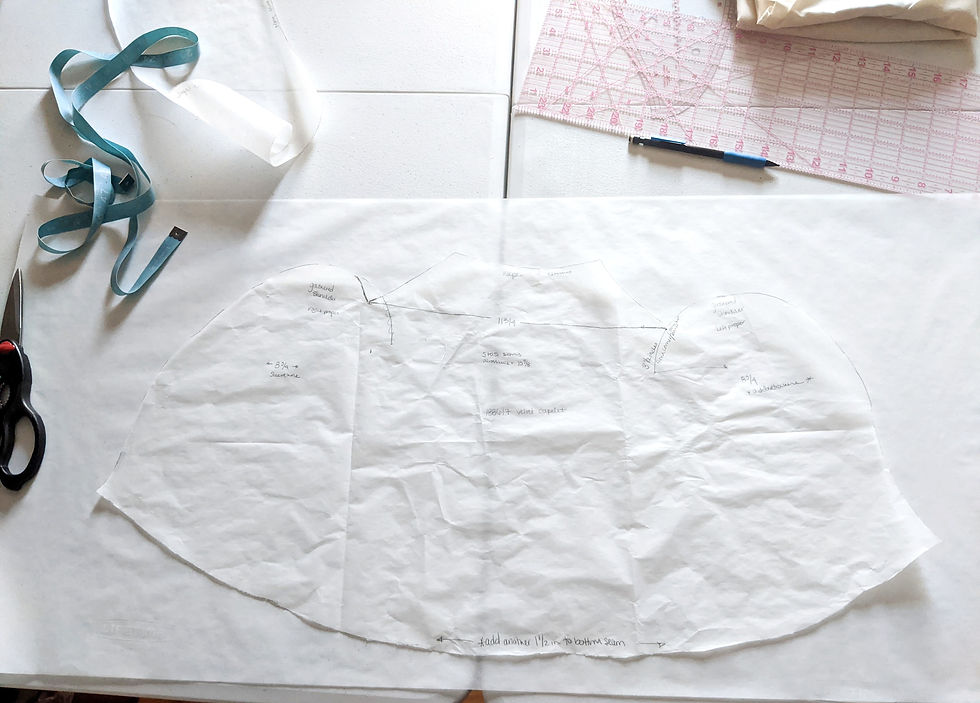
So, to use this method, you start by placing tissue paper on the inside of the garment, and move along the seam lines, marking them with pins. Then you trace from pin to pin, essentially creating a pattern of that particular section. Because this garment doesn't have armholes - more like indentations - the garment itself was tricky to maneuver, as you're supposed to do this all with the piece draped over your left knee. If the capelet had been less of a robust piece, I would be concerned with placing pins in through the tissue into the fabric itself, but this is a well made and extremely durable capelet, and I didn't fear damaging the lining.


The cool thing about Madam Löfvall's method is that it gives a pretty darn accurate shape of the pattern, even if it's not 100% accurate. I did forget to take into account that I was working from the lining, and so when I went to make my toile it was much smaller than the actual piece. There's a few adjustments I need to make to accommodate for this in the final pattern, but overall, I would say it's a method I will most likely be using again. Granted, I don't know of any other method, so there is that...
The first toile I made was too small across the back (the original capelet almost fits me), and the seams across the shoulders were too small. Somehow, the collar was also 2 inches short. And of course, I neglected to take photographs of all of the toiles except for the final one, but honestly, they were embarrassingly bad, so it's probably for the better.
So, I measured the outside seams of the original garment, made the adjustments on a new drafted pattern, and over compensated on the front half of the sleeves. I kept the two front panels I made for the first toile, as I didn't think they really needed tweaking. This second toile still wasn't what I was looking for. For starters, my sewing machine went on the fritz and decided to spew out tons of extra upper thread with every few stitches. I still don't exactly know how I fixed it.

The shoulder seams in the first draft also weren't quite high enough to create the beautiful Italian shoulder seen on the original, so on this second pattern I raised it slightly in addition to making it wider.

This second draft was a bit of a disaster, to be honest. I picked it apart and started over. Luckily, the extra bit that I added to the sides of the shoulders was an easy fix so I didn't need to cut any more muslin for the toile.


In the third toile, I went back to the original shoulder structure and added vertical height. I stupidly remembered watching a free masterclass through Foundations Revealed all about shoulders and creating patterns, and realized exactly what I needed to do: cut and spread the pattern to create more vertical and horizontal width. I kept the same dimensions across the back, as well as the same size for the front panel. It's not perfect. But I'm happy with it. So happy that I think I actually might make my own capelet to wear around the house (even this toile is keeping me warm!)


Just a disclosure: The pattern I drafted and then made a toile for does not fit me and I know this - nor does the original garment. The original owner of the garment had a smaller bust and a smaller waist than me, and was a little bit longer in the chest area, and it definitely shows on the toile. The toile itself is slightly smaller than the original, and I need to make adjustments for it to be an exact pattern for the piece. I wasn't planning on making a capelet for myself - I solely wanted to test the pattern I drafted to see if the construction was similar to the original. And I definitely think Madam Löfvall's pattern drafting is a success! I hope to offer the pattern when I do the formal writeup of the cape, so stay tuned!


